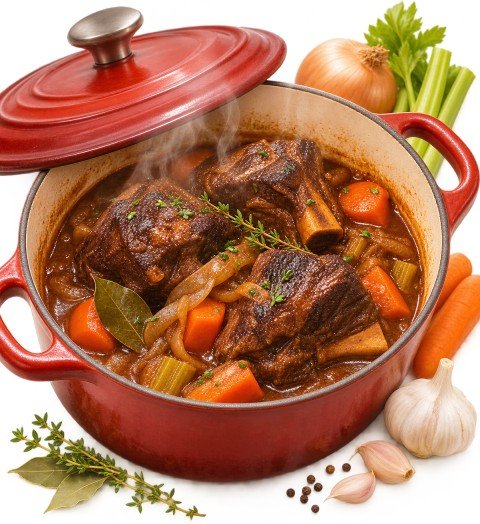
Some of the toughest cuts of meat can become the most delicious, if you give them enough time.
There’s something wonderful about a pot of meat that’s been cooking slowly for hours. The kitchen smells incredible, the sauce has become rich and glossy, and the meat is so tender that you barely need a knife. It’s hard to believe that the same piece of meat might have been unpleasantly chewy if you’d cooked it quickly in a frying pan.
That’s the beauty of braising. It takes cuts that are often overlooked because they’re tough and turns them into deeply flavourful meals. And despite how impressive the results can be, the technique itself is surprisingly simple.
What Is Braising?
Braising is a cooking method that combines dry and moist heat. You usually begin by browning the meat in a hot pan, then cook it slowly in a covered pot with a relatively small amount of liquid.
Unlike boiling, the meat doesn’t need to be completely submerged. The liquid might come about one-third to halfway up the sides, while the covered pot helps retain moisture and heat.
Braising works particularly well with cuts such as beef chuck, brisket, short ribs, lamb shoulder, and pork shoulder. These cuts contain connective tissue rich in collagen, which gradually breaks down into gelatin during long, gentle cooking. This gives the meat a tender texture and adds body to the cooking liquid.
Start by Browning the Meat
One mistake I used to make was thinking that browning meat before braising was an unnecessary extra step. After all, if it’s going to cook for several hours, why bother?
The answer is flavour.
When meat develops a brown crust, the Maillard reaction creates complex savoury flavours that eventually become part of the sauce.
Pat the meat dry with a paper towel, season it with salt, and heat a little oil in a heavy pot. Brown the meat on several sides without overcrowding the pan. You don’t need to cook it through at this stage. You’re simply building flavour.
Once browned, remove the meat and set it aside while you prepare the rest of the dish.
Build Flavour in the Same Pot
Those little brown bits left behind after searing are worth keeping. They’re called fond, and they can make a braised dish taste much richer.
Lower the heat slightly and add chopped onions, carrots, celery, or garlic, depending on what you’re cooking. Let the vegetables soften and pick up some colour before adding your liquid.
Stock, water, tomato-based sauces, or wine can all work well. As you pour in the liquid, gently scrape the browned bits from the bottom of the pot so their flavour becomes part of the sauce.
You can also add bay leaves, thyme, rosemary, peppercorns, or other seasonings. The idea is to create a flavourful cooking liquid that will gradually develop as the meat becomes tender.
Low Heat and Patience Make the Difference
This is where braising becomes wonderfully hands-off. Return the meat to the pot, add enough liquid to reach roughly one-third to halfway up its sides, and cover with a lid.
You can braise on the stovetop over very low heat or in an oven set around 150–160°C (300–325°F). The liquid should maintain a very gentle simmer, not a vigorous boil.
Depending on the cut and its size, braising may take two to four hours, sometimes longer. A small piece of lamb shoulder will behave differently from a large beef brisket, so cooking times are only estimates.
The most reliable sign of doneness is tenderness. When a fork slides into the meat easily and the fibres separate with little resistance, it’s ready. For whole cuts, safe minimum temperatures still matter, but braised meat often needs to reach higher internal temperatures before its connective tissue softens sufficiently.
Why Does Tough Meat Become Tender?
The interesting part of braising is what happens inside the meat.
Tough working muscles contain substantial connective tissue. During prolonged cooking, collagen gradually changes into gelatin, helping create that soft, succulent texture associated with slow-cooked meat.
But there’s a balance. If the cooking temperature is too high or the meat cooks excessively, its muscle fibres can lose too much moisture and become dry or stringy.
That’s why gentle heat matters. Braising gives connective tissue time to soften while limiting the harsh effects of aggressive boiling.
And if your meat is still tough after two hours, it may simply need more time. Check that there’s enough liquid, keep the heat gentle, and continue cooking until the texture improves.
Don’t Forget the Sauce
Once the meat is tender, the cooking liquid is often just as valuable as the meat itself.
Remove the meat carefully and taste the sauce. If it seems thin, simmer it uncovered for a few minutes to reduce and concentrate the flavour. If it’s too rich, a little acidity from lemon juice or vinegar can help balance it.
You can strain the sauce for a smoother finish or leave the vegetables in for a more rustic dish. Either approach works.
Serve the meat with mashed potatoes, rice, bread, or anything that can soak up the sauce. Some braised dishes taste even better the next day, after their flavours have had time to settle together in the refrigerator.
Common Braising Mistakes to Avoid
The biggest mistake is rushing. Tough cuts need enough time for their connective tissue to soften, and increasing the heat dramatically won’t necessarily improve the result.
Another common problem is using too much liquid. If the meat is completely submerged, you’re moving closer to stewing than traditional braising. That isn’t necessarily bad, but it changes the cooking process.
Keep the lid on for most of the cooking time, check the liquid level occasionally, and avoid letting the pot boil aggressively. If the liquid evaporates too quickly, add a little more hot stock or water.
Most importantly, choose a suitable cut. Lean, tender cuts such as beef tenderloin generally don’t benefit from hours of braising because they lack the connective tissue that makes this technique so effective.
Good Braising Rewards Patience
There’s a particular satisfaction in lifting the lid after a few hours and discovering that a tough piece of meat has become beautifully tender. The sauce has deepened in colour, the vegetables have softened, and the whole dish tastes as though it required far more effort than it actually did.
That’s what makes braising such a useful skill. You don’t need expensive ingredients or constant attention. You need a suitable cut of meat, a flavourful liquid, gentle heat, and enough time.
Sometimes, the best thing you can do for dinner is simply leave it alone long enough to become delicious.